How to add frame to facebook post from A to Z?
Facebook is a popular social network with billions of users worldwide to share information, images and connect with friends as well as an effective channel for promotion and sales. Every day, a lot of content is uploaded to Facebook, so if you want your post to stand out from the crowd and attract the attention of many people, you need to know how to add frames to your Facebook post. Follow the article below by Rentfb to learn how to add frame to facebook post to enhance personalization, create professionalism and support Facebook advertising campaigns to promote interaction.
What is Facebook Frame?
This is a popular feature released by Facebook in 2016 that allows users to create their own decorative frames for profile pictures to support events, festivals, etc. In addition, this feature allows you to create your own frames to promote your brand to support your communication and marketing campaigns. By using Frame Studio on Facebook, you can also create your own frames for your friends and followers to see on Facebook.
Facebook Frames are a great way to create your photos and videos to increase reach and brand awareness. This feature is popular for use in advertising campaigns because of its simplicity and virality. After many policy changes, this feature has been limited. Only a few government organizations or NGOs are directly supported by Facebook.
Benefits of adding frames to Facebook posts
If you know how to add frames to your Facebook posts, you will get the following benefits:
Enhance professionalism
Although the frame design is quite simple, it is highly effective in making Facebook posts more attractive and professional. When the post is framed, it will create a neat, easy-to-see and more organized feeling. This is very useful for online businesses because it enhances brand reputation in the eyes of customers. Because an advertising post will be placed in a beautifully designed frame that can attract attention.
Get user attention
Every day, users will be exposed to hundreds, thousands of posts on Facebook from friends, pages they follow or advertisements. So if you want your post to stand out and attract attention, adding a frame is necessary to solve the problem. Adding a frame to the post will create a strong impression and needs to be designed with harmonious colors, enhance creativity and attract viewers easily.

Enhance brand awareness
For businesses or individuals who want to build their brand on Facebook, adding a frame will increase recognition. A frame in a post that is designed in sync with the logo, color and brand personality will help viewers remember the brand image in the minds of customers immediately.
Make a difference and personalize
Adding a frame to your Facebook post will make it unique and personal. This is especially useful when you want to convey your promotional message quickly and effectively. A frame that is designed to match your post will make users more interested and appreciated. Adding a frame to your post will make it unique and different from other posts on Facebook. If you regularly post content on Facebook, it will create consistency for your Fanpage or Profile. This helps to increase professionalism and viewers can recognize your business’s unique style.
Support effective advertising campaigns
Using frames in posts will maximize support for Facebook advertising campaigns to help promote interaction. Because framed advertising posts will make a strong impression and increase the likelihood of users clicking and sharing content. Design tools such as Canva, Photoshop or editing applications will support creating frames quickly and easily. This helps you save time and achieve high efficiency in promoting products or services, brands.
How to add frame to facebook post
How to create a Facebook frame
Before you can access Facebook’s Frame Studio, you need to create a unique design using the professional design tool. Once you’ve finished your design, click on Frame Studio. Click on Create Frame and Get started.
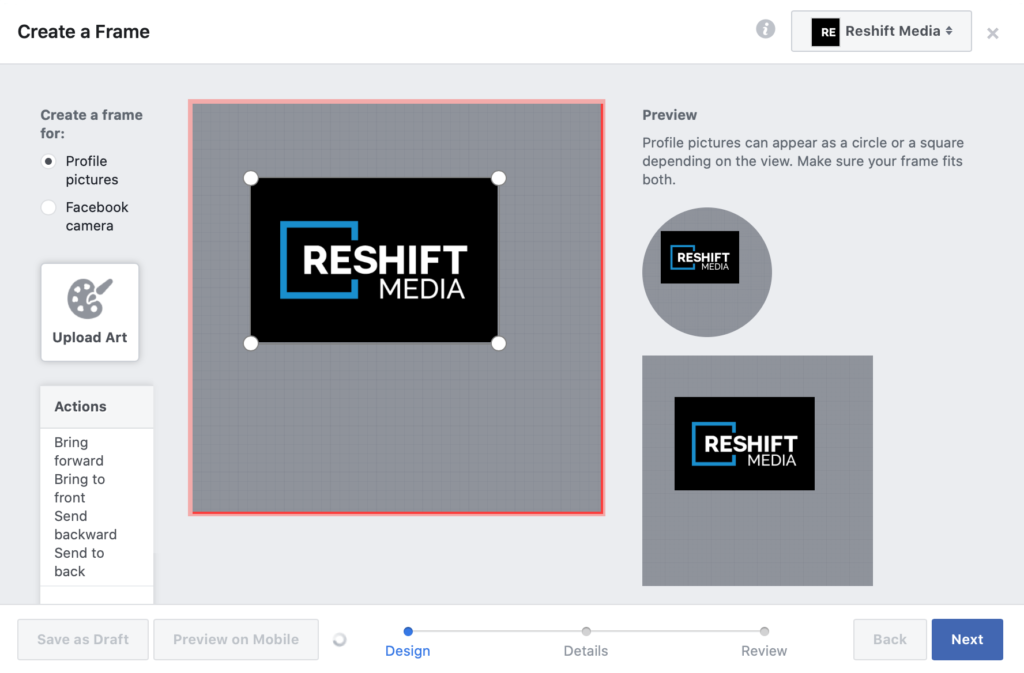
The editor will then open the image file in PNG format. You can choose a frame for your profile picture or Facebook camera. Drag and drop your PNG or use the Upload Art button to place the design on the page.
You can upload multiple art elements in your Frame and the elements can be resized and moved around. Once you have placed the elements in the desired area, click next.
A new screen appears, where you can name your Frame and associate it with the Facebook account or page you want to use the Frame with, along with a publish date and keywords. In the advanced section, customize whether to show the Frame to everyone or geo-target it to people in a specific location.
Click next and preview the Frame before publishing. After publishing you only have to change the time you want it to appear.
Alternatively, you can go directly to Facebook’s Frame Studio and select Create Frame. Next, locate the PNG frame image on your computer and drag and drop it into the PNG Drag and Drop window. Now resize the image in the editor to fit the frame. Then click the Customize Profile Photo button in the Create Frame for section.
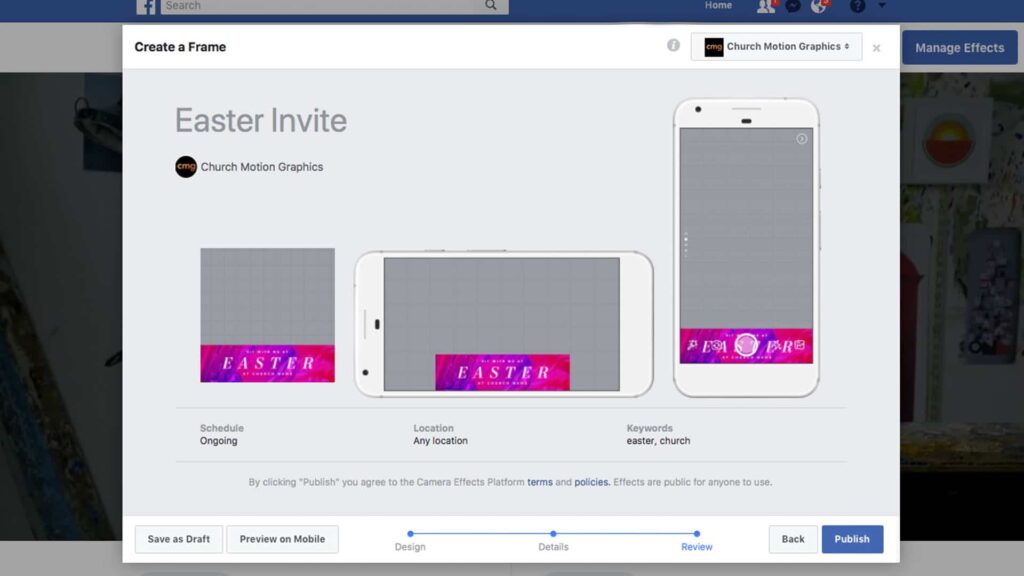
Now click Next and select the owner for the frame in the upper right corner. Then add a name for the frame and select the scheduling option to set when your frame will be published.
You can add visual and memorable keywords to help users find your frame on Facebook. When you’re done, select Next to check that the frame fits the device screen size. Now tap Save as draft to save the frame or tap Publish if you’re ready to share your frame.
A dialog box will appear asking you to review your frame configuration before publishing. Please review it and click OK. Then select Cancel and go back to make any necessary edits. Facebook will process the publishing request and you will receive a notification on Facebook when the frame is approved or rejected.
If your frame is rejected, it may be because the image doesn’t meet Facebook’s Community Standards or formatting guidelines. After reviewing the guidelines and adjusting your image accordingly, you can resubmit your frame.
Add a frame to your Facebook post
Once you have a Facebook frame, you can add it to your post from your desktop status update. Click Create Post with Frame and select an existing frame or upload a new one. You can now manage your frame in the Publishing Tools section of your Facebook page, which is super simple and convenient.
By adding frames to your Facebook posts, you can make your posts stand out, more attractive and engaging. This will greatly support your promotional and communication campaigns on Facebook.
Contact Info
We provide services dropship facebook nationwide, and with a team of experienced and qualified staff who both support advertising and can directly perform Facebook advertising if you need. Contact us via phone number.
Frequently Asked Questions
After you create and submit your frame to Facebook for review, your frame may be rejected for not meeting the community standards or the platform’s terms and policies. Additionally, it will be rejected if the design is not properly customized or does not follow the formatting guidelines. In this case, you should make the necessary changes to resubmit the request. This frame review process usually takes 1-3 days or even longer.
This situation occurs because the latest update from Facebook from March 2022, Facebook has removed all profile picture frames from the Facebook Frame Library. Therefore, users cannot create frames directly on Facebook and add them to their profile pictures. Only approved Facebook pages belonging to authorized organizations can create profile picture frames.

