How to add Facebook Pixel to WordPress site
Facebook Pixel is a “powerful assistant” that helps boost advertising effectiveness and makes the sales process easier. So what is Facebook Pixel? How to add facebook pixel to wordpress site. If you are also having similar concerns, let’s explore the details with RentFB through the article below!
Facebook Pixel Overview
Facebook Pixel is a JavaScript code provided by Facebook to advertisers and content creators, allowing them to insert this code into their websites. With outstanding features, Facebook Pixel helps track the behavior of users visiting the website and measure the effectiveness of promotional campaigns. From there, businesses and sellers can flexibly adjust their marketing strategies to best suit.
There’s no denying that Facebook Pixel brings many outstanding benefits to advertising campaigns, including:

Make sure your ads are shown to the right audience
Facebook Pixel allows you to track user habits and behaviors when accessing a website. Based on the collected data, businesses can develop appropriate content and promotional plans, targeting the right audience on Facebook. This helps increase the chance of reaching customers who are truly interested in your product or service.
Build a lead file
One of the outstanding features of Facebook Pixel is Custom Audience. This feature helps identify potential customer groups based on their interaction data on the website. Shop owners or businesses can take advantage of this information to plan consultation, introduce products and design appropriate advertising campaigns, thereby improving order conversion rates.
Measuring advertising effectiveness
Facebook Pixel provides detailed data to help evaluate the effectiveness of each promotional campaign. This allows sellers or businesses to analyze the factors that contributed to success (such as content, images, or approach) and adjust the factors that did not work to optimize future campaigns.
Increase customer re-engagement
Pixels allow for the collection and storage of data related to customer behavior on the website, such as viewing products, adding to cart, completing orders, or using discount codes. Through this data, merchants can easily identify “bottlenecks” that customers encounter during the shopping process and design precise marketing campaigns to promote transaction completion.
How to add Facebook Pixel to WordPress site
Facebook Pixel is a powerful tool that helps you track the performance of your Facebook advertising campaigns, optimize your audience, and increase conversions. In order for Facebook Pixel to work properly on your website, you need to install the Pixel code on your website. Here is a step-by-step guide on how to install the Pixel on your website, especially for those using the WordPress platform.

Method 1: Install Facebook Pixel via WordPress Theme
Assuming you are using WordPress admin page, the first step is to insert the Pixel code into your website Theme. This Pixel code needs to be placed before the closing tag </head> in your website’s HTML code to ensure that it is enabled on all pages of your website. This allows you to track user behavior across your entire website, not just limited to a few specific pages. Steps to follow:
- Step 1: Log in to your WordPress admin page.
- Step 2: From the admin interface, go to Appearance and select Theme Editor.
- Step 3: In the theme editor, find and select the header.php file, which contains the basic HTML code of the website, including the
<head>. - Step 4: Insert the Facebook Pixel code you copied into the position before the closing tag
</head>. Make sure the code is pasted in the correct location so it can work properly. - Step 5: After inserting the code, click Save to save the changes.
Note: This method should work for most WordPress themes, however if you are using a specific theme, you should check the theme documentation to make sure you are installing the code in the correct location.
Method 2: Install Facebook Pixel in WordPress Plugin
Another way to install Facebook Pixel is through WordPress Plugins. This method can be easier than editing directly in the theme files, especially for those who are not familiar with programming code. Below are the detailed steps to install Facebook Pixel through Plugins. Steps to follow:
Step 1: Go to Plugins in the WordPress admin interface, then select Add New. Search for one of the plugins that support Facebook Pixel installation such as:
- Pixel Caffeine (free)
- PixelYourSite Pro (about 80USD)
- Tracking Code Manager (free for simple version)
Step 2: Once you find the right plugin, click Install Now and then Activate.
Step 3: Once the plugin is activated, go to the plugin settings. In the configuration section, you will see a box asking you to enter your Pixel code. Paste the Pixel code into this box or enter your Pixel ID.
Step 4: Once you’re done configuring, click Save to save your settings. You can use the Facebook Pixel Helper tool to check if your Pixel is working properly.
Installing Facebook Pixel on your website is an important step to optimize your Facebook advertising campaigns and measure their effectiveness. You can do this by inserting the code directly into your WordPress theme or using supporting plugins. Either way, installing Facebook Pixel will help you build a more accurate and effective advertising strategy, helping your business achieve the expected results. Hopefully this article will help you successfully install Facebook Pixel on your website!
Contact Info
You need a Facebook advertising account but don’t know any reputable provider. Coming to
Rentfb is where you will experience what you need crypto ads on facebook prestige, high trust, and professional consulting and service support for customers.
Frequently Asked Questions
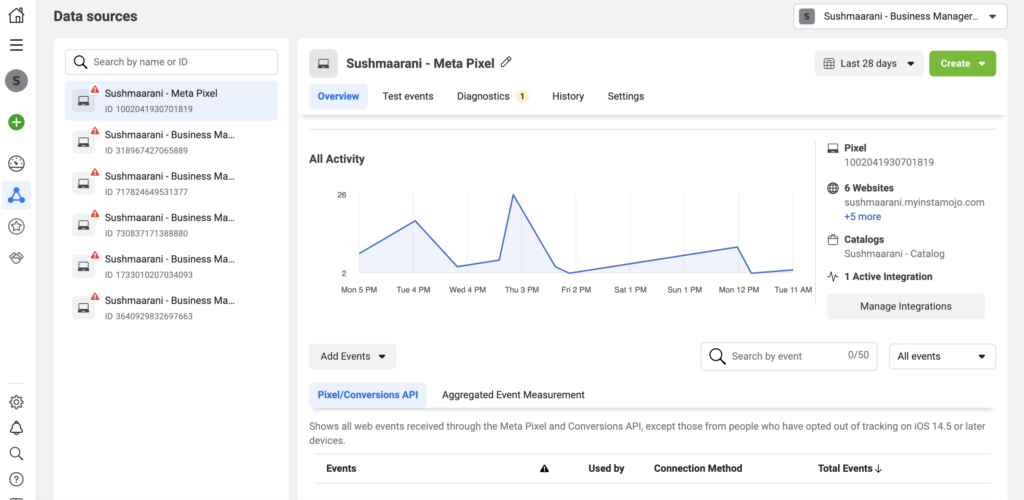
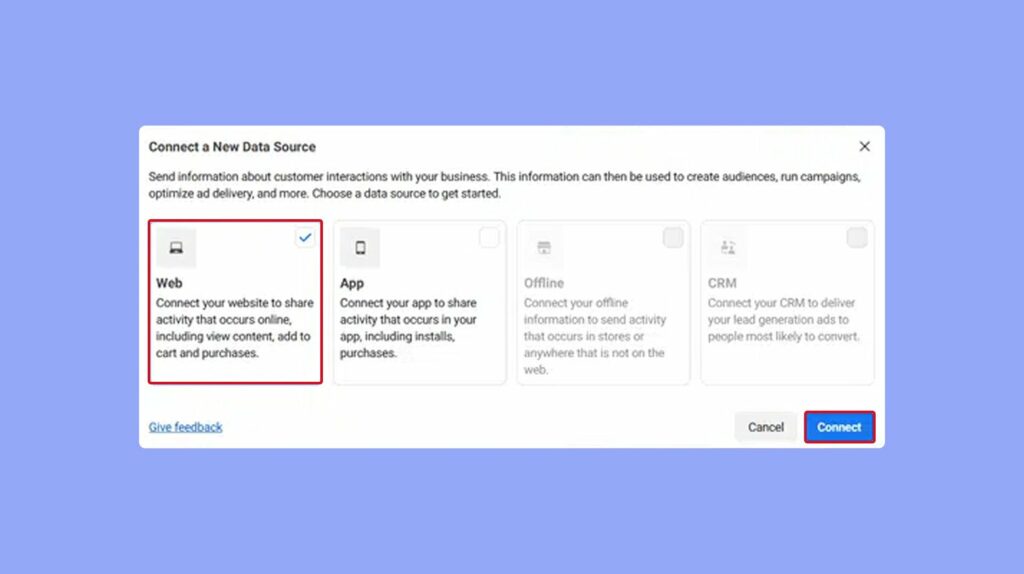
To create a Facebook Pixel, follow these steps: First, go to Events Manager on your Facebook Business account. Then, select the Connect Data Sources tab and click Web. Next, select Facebook Pixel and click Get Started. Name your Pixel, enter your website URL (if applicable), and then click Continue. Once complete, you’ll receive a Pixel code snippet to install on your website. Once installed correctly, the Pixel will start collecting data and helping optimize your ad campaigns.
Meta Pixel (formerly Facebook Pixel) is a JavaScript code snippet provided by Meta that helps advertisers track and measure user behavior on their website. This tool collects data such as visits, shopping actions or registrations, thereby optimizing ad performance and building potential customer files. Meta Pixel not only supports measuring the effectiveness of advertising campaigns but also helps businesses reach the right audience and increase conversion rates effectively.